Nowadays, many companies are looking for enabling hybrid work, so It's really important to know how to install and deploy a Zoom Room for shared spaces.
First, you need to get a Zoom Room License, as far as I know, you can get it via Zoom One Enterprise License. However, I recommend you read more on
Zoom Pricing & Plans.
Before connecting your devices, I highly recommend you manage your devices with ZDM (Zoom Device Management), but your company network includes firewall or proxy servers? If so, you need to add "https://zdmapi.zoom.us" to the allowed list of network domains in order to allow communication with ZDM server.
Also, check the following configurations:
|
Protocol
|
Port
|
Connection
|
|
TCP
|
9090
|
ZR
Controller to ZR
|
|
TCP
|
443
|
ZR Controller or Scheduler to
Cloud
|
|
UDP
|
3478, 3479, 8801
|
ZR to Cloud
|
|
TCP
|
8801, 8802, 443
|
ZR to Cloud
|
|
TCP
|
8888
|
Client to ZR (Direct Share)
|
|
UDP
|
8889
|
Client to ZR (Direct Share)
|
Are you planning to connect your video system to wireless and controller to wired network or, vice versa? Well, please ensure that wireless can reach wired subnet.
It's time to connect your devices, you have Studio X Series? Visit
this blog post in order to know how to do it.
Now, we're ready to get into ZDM, go to https://zoom.us/signin on your preferred browser, and enter your Email Address and password or, use SSO options. Remember that you must have the zoom rooms privilege.
Under admin options, click on Room Management > Zoom Rooms
Now, click
+Add Room button.
You must select a Room Type, in this post I'm talking about Zoom Room for shared spaces, but I'll set aside time to talk about other types later. In this moment, please select option for shared spaces as Room type.
Set the Room Name, and if you have already linked a calendar service, choose one. However, you can choose it later, so don't worry if you haven't linked one.
Last but not least, choose a location, and then you can save and add another room or, just finish. In this example, let's click on Finish button, but if you wanna add another room, then click on Save & Add Another button and repeat the steps above.
Now, select your new room, and click on Room Settings.
 |
Location Directory
|
 |
Room Settings
|
As you can see, there are 7 tabs, and they are as follows:
- Room Profile
- Meetings
- Display
- Alert
- Digital Signage
- Scheduling Display
- Whiteboard
First, let's configure Room Profile, I recommend you set Dark as theme on basic configurations. Although this is the best option for me, you can set a theme that you prefer.
Upload your company's background for Zoom Room on setup settings.
 |
Background for Zoom Room
|
Under devices settings, set default camera tracking mode. It could be Speaker Tracking, Group framing, Smart Gallery or another. Are you joining a video? This is the way a camera will be working, nevertheless, you can change tracking mode during a call.
 |
Tracking Mode
|
Are you looking for Multi-Camera Mode? In next posts, I'll be taking about it, stay tuned. 👀
It's time to click on Meetings tab. On Zoom Rooms configuration, turn support interoperability for Zoom Rooms on, and enable 3rd party meetings and show them on home screen options.
 |
3rd Party Meetings
|
You can customize guest name and email, and connection method prioritization. After configuring options, click Save button.
Under this tab, you can enable voice commands to check in/out, join or leave a meeting and stuff.
How many displays are connected to your video system? On Display tab, you can choose the way shared content, participants and yourself are shown in your display(s).
 |
| Displays |
Just click on the participant icon or display options, choose the option that works for you, and then click on Save button.
Go to Digital Signage tab, and select Add Content option.
As you can read, there are several options to add content. For instance, you can connect to Google Drive, OneDrive or Dropbox, select the option that works for you.
Add as many flyers/videos as you need, and click on "Add item" button.
Set display period, mute all content, enable digital signage and click on Save button.
Finally, get back to Basic configurations on Room Profile tab, and find Activation Code, this is the code that you need to type in your controller.
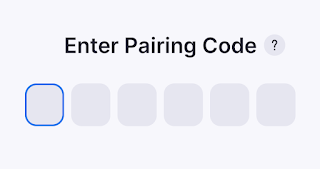
Before typing in an activation code, you may need to type in a paring code, your controller would look like this:
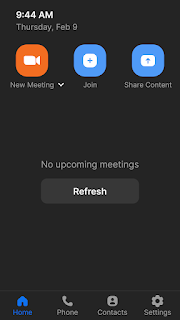
You can find it on your display, but in case your controller doesn't request a pairing code, it will look like this:
Let's click Activation Code, and then enter it. You will get a zoom room controller, and your background image will be displayed on your screen. It depends on your controller, but it could be like this:
 |
Opt 1
|
 |
Opt 2
|
For a basic configuration, that's all. You have a special need? Let me know in the comments or, feel free to reach out.
Remember to subscribe to my blog on home screen, and follow me on my social media. 😎
Connect with me
If you like my blog, and it's helped you, let me know with a coffee 😃😄


Comments
Post a Comment